
| Properties | ||
| Offset | The maximum amount of displacement of each pixel in the background. This may be reduced depending on the color of pixels in the map layer. Default: 0.000000,0.000000 |
|
| X | Selects whether Luminance Red, Green, or Blue channels will be used to calculate displacement along the X axis. Default: R |
|
| Y | Selects whether Luminance Red, Green, or Blue channels will be used to calculate displacement along the Y axis. Default: G |
|
| Edges | Controls what happens when the displacement makes background pixels that would normally be outside of the screen visible.
|
|
| From Center | Changes the displacement behavior so that lighter pixels in the map layer shift in direction of the given /Offset, while darker pixels shift in the opposite direction. Pixels with exactly 50% intensity in the relevant color channel cause no shift at all. Default: off |
|
| Invert | Reverses the effects of light and dark pixels in the map layer. Default: off |
|
Usage
The Displacement Map effect is applied to a map layer and shifts or displaces the pixels behind the map layer based on the color of pixels in the map layer. The map layer effectively becomes transparent during this process.

The overall displacement is calculated by combining the Offset with the color of each pixel in the map layer. By default, the red component of the pixel color is used to scale the X component of Offset and the green component of the pixel color is used to scale the Y component. Assuming a grayscale map for simplicity, brighter pixels cause a larger shift and darker pixels cause a smaller shift (in a grayscale map, white pixels fully apply the given Offset and black pixels cause no shift at all).
Fig 1. Animated Vertical Offset. Left: Background layers. Center: Background layers with map layer on top. Right: Displacement Map has been applied to the map layer.
Consider Fig.1: On the left you can see the background layer. In the center, the map layer is overlaid with no effect applied. On the right, the Displacement Map effect has been applied to the map layer, and the Offset is being animated up and down along the Y axis.
As you can see, the white area moves furthest, while the black area does not move at all.
This behavior can be customized by adjusting certain settings.
From Center changes the behavior so that white pixels shift in one direction, black pixels shift in the opposite direction, and neutral gray pixels don't move.
Invert causes the offset to be reversed (the behavior of black and white is swapped)
Left: Normal; Middle: From Center is enabled; Right: Invert is enabled.
In addition to using the layer luminance, this effect can be configured to calculate the X and Y displacement separately based on the Red, Green or Blue components of pixels in the layer, but adjusting the X or Y properties.
Weighted Luminance
This effect uses weighted luminance, where the luminance of a pixel is calculated by averaging weighted values for for the red, green, and blue components rather than the raw values.
This often desirable because to humans, green light appears brighter than an equivalent intensity of red or blue light, so giving green more weight when calculating luminance yields results that appear more natural to humans.
The specific calculation used is as follows (where Y represents luminance):
Y = R * 0.2126 + G * 0.7152 + B * 0.0722
Use Cases
Displacement Map is a very versatile effect. It can be combined with other effects to create a wide range of interesting and useful results.
Wipe + Displacement Map
Here, the Wipe effect is combined with Displacement Map to create a sliding ripple.
Here's how:
- Create the background layer
- Create a blank white layer in front of the background (this will be the map layer).
- Apply the Wipe effect to the mask layer, using keyframe animation on the Start and End positions (in the example here, we also adjusted the angle).
- Optionally, apply a Box Blur to the map layer (blurring the edges of the map causes a refracted look along the edges, giving more of a glassy look).
- Finally, apply the Displacement Map to the map layer and slightly adjust the Offset.
Ripple / Energy Burst
Here, we use a plain circle with a white outline and no fill, together with a Gaussian Blur and a Displacement Map to create the ripple on the left; change the layer's blending mode to screen for the energy burst look on the right.

Here's how:
- Create the background layer (a photo or video is best for this).
- Create a circle layer in front of the background (this will be the map layer).
- In Color & Fill turn OFF the fill using the icon on the left:

- In Border & Shadow turn ON the Stroke option, set the color to white and the thickness to something large (say, 80).
- Select the circle layer and apply Gaussian Blur (we used a strength of about 0.4, but you can adjust as you like).
- Apply Displacement Map to the layer.
- Use Move & Transform to apply a keyframe animation to the size of the layer, so that it grows from the center to the edge. (In the example, after this, we duplicated the layer and moved the duplicate a little later in time, for multiple rings)
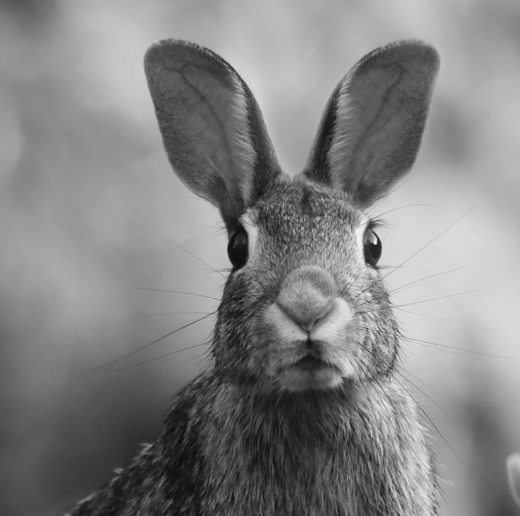
Fake 3D Parallax
Here, a still image is brought to life by creating a depth map using Freehand Drawing, then applying a Displacement Map to displace pixels based on their depth.

A depth map is a layer where pixel brightness indicates the distance of a pixel from the viewer (the depth into the scene). While pixels are closer to the viewer (or camera) and black pixels are further.
Here, we started with a still image of a bunny:
We then using Freehand Drawing to very roughly sketch out the parts of the image in gray tones based on their distance (forgive our drawing skill: It doesn't need to be good for the effect to work).
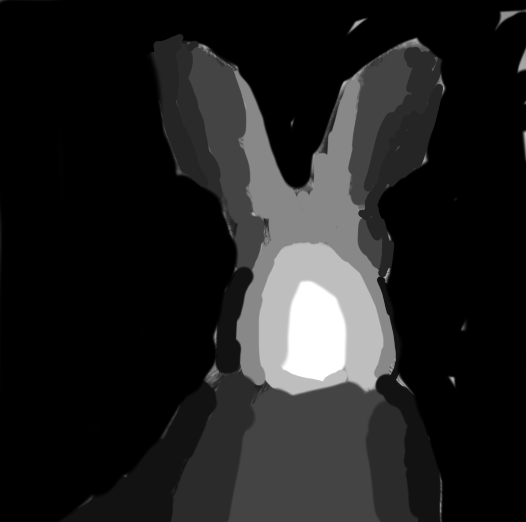
We then apply a Gaussian Blur effect to smooth out the edges (and hide our bad drawing skill).

This is our depth map. We then apply Displacement Map this layer, and animate the Offset. (NOTE: Use very small adjustments to offset, otherwise you'll get unwanted distortions in the result).
Glitch
Displacement Map is great for building a variety of glitch effects. Here's just one example:

To make this effect, we first made the RGB separation using the RGB Split effect.
We then created a map layer using just a blank white square shape with a series of effects applied to it:
- Block noise (stretched out a bit horizontally)
- Mosaic (with a smaller size than the block noise)
- Noise (with "Freeze" turned on and "Amount" set quite low)
This results in a map layer that looks like this:
The flickering is because of the automatic animation of the Block Noise, but you can use any effect with a random component and and keyframe Seed instead for different types of glitches.
This map layer is then placed in front of the text layer, and Displacement Map is applied, using keyframe animation to increase and then decrease the Offset over time.
Melt
Here, we use a simple map layer: Just Clouds stretched vertically. By animating the Offset along the Y axis, we can creating this melting look.

See Also
- Polar Displacement Map
- Turbulent Displace
- Tile Shift
- Hexagon Tile Shift
- Fractal Warp